
All about Chest Shops
Chest Shop Guide
Introduction
Chest Shops are in-game player made shops that other players can interact with and purchase from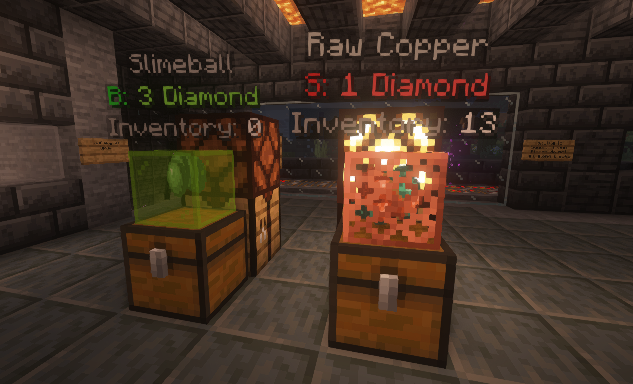
Short Video Tutorial
https://www.youtube.com/watch?v=yYAL7OGVz2w&embeds_referring_euri=https%3A%2F%2Fwww.spigotmc.org%2F&source_ve_path=Mjg2NjY
The Server Market
You can visit the Market anytime by typing /spawn and walking straight (south). Alternatively if you have atleast 2 hours played, you can just type /warp shop at anytime to teleport straight to the market.
The market is where you can request a plot to build a shop where you can buy or sell goods using Chest Shops, which we will explain later in this tutorial. You must request a plot in the Tradeshops channel on our Discord or speak to Arz323 directly in game. You can also try requesting a plot from an online administrator if Arz323 is not available.
Updated Server Market Rules
1. Try to stick to a theme, avoid mega malls
2. 1 Plot per player to remain fair
3. If player/shop is deemed inactive it runs risk of removal (all materials will be stored and can be claimed later)
4. Keep your shops stocked the best you can
5. No dirt huts or empty plots, put effort into a pretty store
6. No excessive redstone or farms (mostly for lag)
7. No building shops or additional shops outside of the main shopping district claim
- If any rules are unclear or something is not stated, the active shop manager has final say in anything regarding shop rules, district, plots, etc.
Purchasing from chest shops
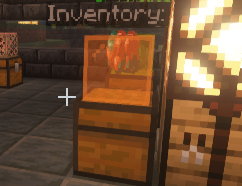
Chest shops can be any storage container that is owned by other players, but is designated by the server for use as a trading platform. They are typically easy to identify, with an item hovering above in a display case, or a text hologram with shop information. To browse its contents, simply right click on it. This will bring up a GUI where you can view the Chest Shop's available selection, with the option to either click an item to add it to your shopping cart, or you can hold shift to purchase/sell instantly. Once the desired item is left clicked, the shopping cart will open and there will be multiple options for you to select from on the bottom. Use the green buttons on the right to add multiple products based on the currency amount in your inventory, use the red buttons on the left to take away from the amount you just added, in the event you added too much, and the blue buttons in the middle can be used to fine tune the amount, to just buy one or to max out the amount. Okay, so now that we've fine tuned the exact amount we want using the tools mentioned, go ahead and click the green Accept button on the bottom right to finalize the transaction. Alternatively if you change your mind, you can click the red Cancel button on the bottom left to go back to the trade shop gui.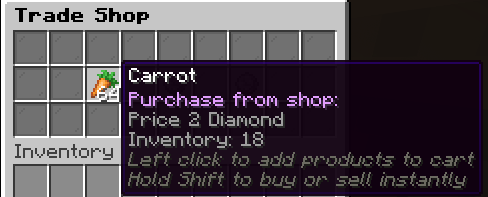
Unlocking your own Chest Shops [/rewards]
Chest Shops on SqueejCraft unlock automatically over time. By default you'll be able to make up to 4 chest shops, however over time you'll be able to make up to 64. You can check when your next available chest shop upgrade is by using the /rewards command in game![]()
Creating your own Chest Shops [/chestshop create]
You can create a chest shop with any storage block such as normal chests, shulkers, barrels, etc. To do so, look at the storage container with an empty hand and run the command /chestshop create. Then, hold shift and right click the newly created chest shop to manage it.
Alternatively, you can create the chest shop instantly while holding the item (and the amount) you would like to trade to. If you've done this by accident don't worry, you can always shift+right click the chest shop to edit it.
Once you create your chest shop and shift+right click on it, a GUI will open up with several tools for you to customize and manage your newly created chest shop. You can come back to this gui and manage your shop at anytime.
Removing a Chest Shop [/chestshop remove]
To remove a chest shop, simply look at it and run the command /chestshop remove. You may be asked to withdraw your funds and empty the inventory before the removal can proceed. Alternatively you can also remove a shop by simply shift+right clicking, and then clicking the Campfire icon on the bottom right labeled "Remove Shop?". Once removed successfully, the storage container will go back to its normal form.
Taking a closer look at the main Chest Shop GUI
This is the default GUI that pops up whenever you shift+right click your chest shops to edit them. It doesn't have a name, so throughout this tutorial we will just refer to it as the main GUI.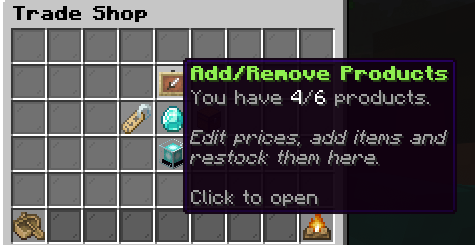
Changing the name of you Chest Shop
You can change the name of your chest shop in the main GUI by clicking on the Nametag icon labeled "Shop Name". Once clicked you will have 30 seconds to type in a new name for your chest shop. This name can be seen by other players who click on your shop to browse your inventory, so please keep it appropriate:)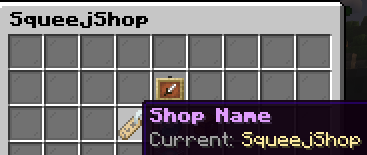
Changing your Chest Shop display
Click the Beacon icon labeled "Shop Display" in the main GUI to open up your shop's display settings. Once opened, you can select from multiple display cases to display the items in the shop above your chest shop. Click the arrow on the bottom to switch pages. Alternatively, you can disable the display entirely by clicking the Beacon icon on the bottom of the Display Settings GUI labeled "Enable/Disable Showcase". Click it again to turn it back on. You can go a step further and also toggle the hologram information above your shop by clicking the armor stand labeled "Enable/Disable Hologram". Disable both if you would like to instead create your own custom sign with shop information, players will still be able to right click and browse your shops even when shop displays are turned off.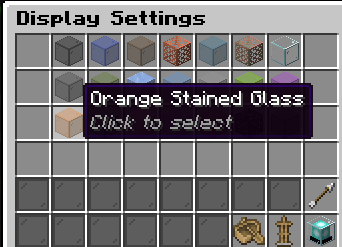
Your Shop Bank: adding funds to your chest shop [Diamond] [Emerald] [Netherite Ingot] [Gold Ingot]
To add funds to your chest shop which can be used for transactions, click the Diamond in the middle of the main GUI labeled "Add/Remove Funds". This opens your Shop Bank, lets click on it
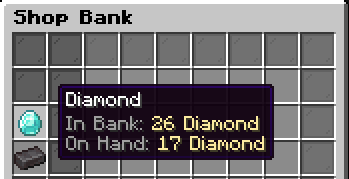
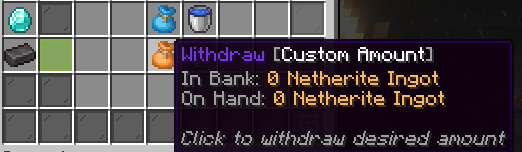
There are two currencies we can use as currency for chest shops on SqueejCraft, Diamonds and Netherite Ingot. To manage funds for a preferred currency, click on it's icon to the left of the Shop Bank to manage it's funds. Once clicked 4 icons will appear in the middle of the Shop Bank GUI for you to manage either deposits or withdrawals. For deposits, be sure to have the desired amount in your inventory. Click the custom icon amounts to enter a specific amount, or just deposit/withdraw it all.
Once deposited, click the icon on the bottom right labeled "Click to go back", where we can continue to manage our chest shop in the main GUI.
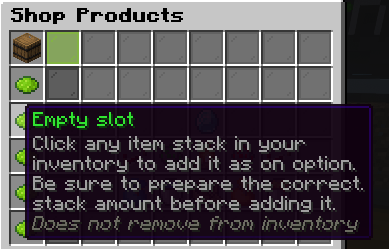
Adding products to your Chest Shop
Clicking on the Itemframe icon at the top of the main GUI labeled "Add/Remove Products" opens the Shop Products gui. This is where we can add up to 4 products for the shops to manage (up to 6 for vip), where we can assign individual prices, currencies and set custom rules, such as whether or not the shop will buy & sell the product for profit, only buy, or only sell. To add a product, click on it within your inventory while viewing the Shop Products GUI with atleast 1 free slot. Be sure to have the correct stack amount that you would like to sell before assigning the stack to slot. This does not remove the product from your inventory. You will still need to stock your shop.
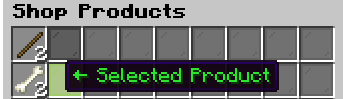
Managing multiple products within your Chest Shop
As mentioned previously, we can add up to 4 products per shop, with a maximum of 6 for vip holders. You can keep adding products in your inventory to your chest shop until you run out of stock. Once added, your products will appear on the left side of the screen as clickable icons. To manage each product individually, click on it's icon. This selects it for edits within the shop products gui. Now every icon in the center of the gui, such as the currency icon and the buy/sell price icons will only impact that selected product. You can continue to fine tune the prices and currencies of each product within your shop, and you can also make it so some products are only buy and others are only sell.
Shop Product customization controls
Once you add a product, this control panel will pop up in the center for you to customize specific rules regarding the selected product, Such as the whether or not buying is enabled or if selling is enabled, and if so what are there prices and what is your preferred currency. Hover over each of these icons to learn what it is that they do for the product that you have selected on the left of the GUI

And last but not least; Stocking your shop
When selling products it's important to remember to right click your chest shop every now and then (without holding shift this time) to open it up and fill it with the product that your selling. If you're buying, you're going to want to make sure you've added plenty of funds (see above for more info)
Good luck fellow entrepreneurs, and be sure to seek help from the community if you have additional questions
(☞゚ヮ゚)☞